
Metadata Schemas
Last Updated: 26 Jun 2017
A Metadata Schema is used to define the metadata fields that need to be filled out on the Metadata screen of an asset. Each schema defines the fields and their type, whether or not it is required, the default value of the field, whether or not it can be edited and which fields appear in the HTML source code of the page.
Once you have added a Metadata Schema, you can configure its settings on its associated asset screens. These screens are often the same or similar to those for a Standard Page and are described in the Asset Screens manual. In this chapter, we will describe the Details and Usage screens.
Details Screen
The Details screen allows you to set up your Metadata Schema by adding Sections and Fields.
Details
By default, the name that was entered into the Schema Name field when the Metadata Schema was created will appear in this section. You can change the name of the Metadata Schema by clicking into the Schema Name field and entering the new name for the Metadata Schema.
Sections Defined For This Metadata Schema
This section shows the sections and fields that have been added to the Metadata Schema. It also allows you to delete fields and sections. If you have not added any sections, no information will appear.
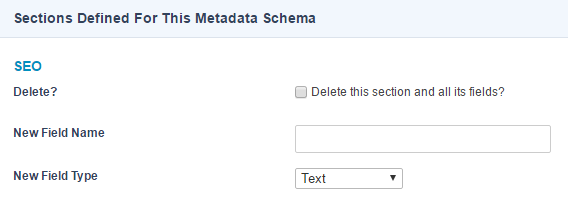
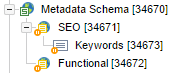
Once you add a section, it will appear in this section of the screen, as shown in the example below.
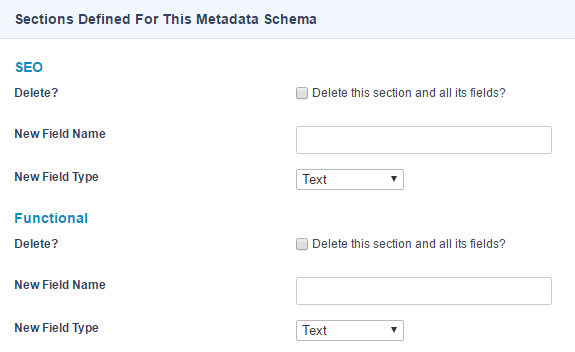
Each blue heading represents a section that has been added to the Metadata Schema. For example, in the figure below, two blue headings appear. This means that two sections have been added to this Metadata Schema.
For each section listed, the following fields are available:
- Delete?: To delete a section and all of its fields, click this box and Save the screen. The section will be removed from the Metadata Schema.
- Section Description: This field will not appear on the screen until you have added a metadata field to the section. Once you have added a metadata field, this field will allow you to enter a description for the metadata section that can then be displayed on the front-end.
- Current Restrictions: This field will not appear on the screen until you have added a metadata field to the section. Once you have added a field, this section will list which asset types this metadata section will be applied to. By default, no asset types will be listed. Once you have selected an asset type from the New Restriction list, it will appear in this section, as shown in the example below.
If no asset types are listed, the metadata section will be displayed for all assets that the Metadata Schema is applied to.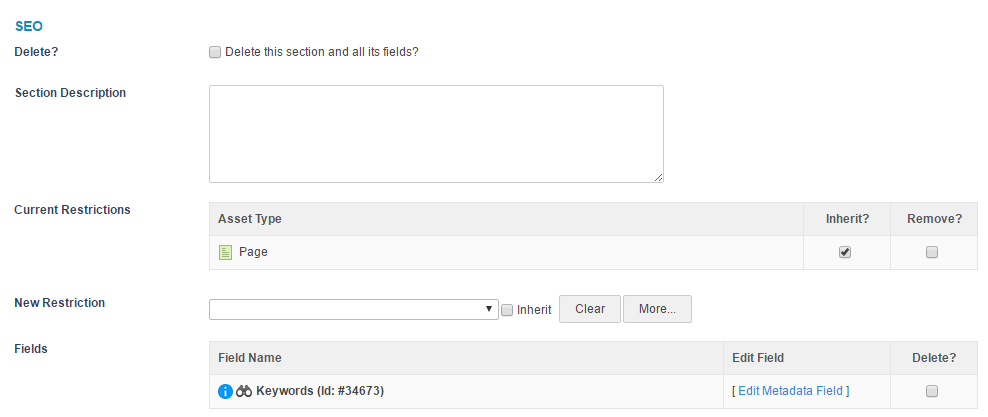
It is strongly recommended to always set an asset type restriction so that your schema doesn't get unnecessarily applied to assets where it's not meant to due to cascading actions.
- New Restriction: This field will not appear on the screen until you have added a metadata field to the section. Once you have added a metadata field, this field allows you to restrict which asset types the metadata section is applied to. For example, if you are going to apply the Metadata Schema to all assets in your Site but only want this metadata section and its fields to be applied to Standard Pages, select Standard Page from the list. To select multiple asset types, click the More…button. An additional field will appear on the screen. The asset types that have been selected will appear in the Current Restrictions list.
- Fields: This field lists the metadata fields that have been added to the section. If you have not added any fields to the section, no information will appear. When you add a field, it will appear in this section of the screen.
To edit a field, click on the Edit Metadata Field link. You will be taken to the Details screen for that field. To delete a field from a section, check the Delete box and click Commit.To rearrange the order of the fields you can move the field assets that appear under the Metadata Schema in the Asset Map
- New Field Name: To add a new field to the section, enter the name of the field into the box provided.
Your metadata field names can only contain alphanumeric characters, full stops, hyphens and underscores.
- New Field Type: When you are adding a new field, select the type of field from the list provided. These options include:
- Thesaurus: A select field generated with options from a pre-defined list of Thesaurus Terms.
- Text: A standard text field that can also be set to a textarea input.
- Select: A select field, checkbox list field, or radio button list field.
- Multiple Text: Dynamic multiple text fields that automatically increases as the user enters a values into the fields.
- Date: A date and/or time field.
- Hierarchy: A hierarchy field is similar to a Select Field where it's generated with a pre-defined list of values. This list, however, can show a hierarchy of information.
- WYSIWYG: An WYSIWYG Editor field.
- Related Asset: An asset picker that lets you associate the editing asset with another.
For more information about each of these fields refer to the corresponding chapters in this manual.
Create New Section
This section allows you to add new sections to the Metadata Schema. Enter the name of the new section into the Section Name field and Save the screen. A new section will appear in the Sections Defined For This Metadata Schema section.
Regenerate Metadata Files
If you have made changes to a Metadata Schema and it has already been applied to assets in the system, your need to regenerate the metadata files before your changes will affect these assets. To do this, check the Regenerate metadata files box and click Commit.
Doing this to a Metadata Schema that is applied to thousands of assets can take a really long time depending on how powerful your server is. It is recommended to do this during low peak load times if regenerating the metadata for thousands of assets at once.
Options
This section allows you to decide whether or not to show the Metadata Schema in the HTML source code of the page. By default, this value is Yes meaning that all sections and fields will appear in the HTML source code.
Please note that metadata does not automatically appear within the HTML source code of a page, unless your Design includes the Metadata design area or the %asset_frontend_metadata% keyword. For more information on this design area, refer to the Designs manual.
Usage Screen
The Usage screen shows the assets in the system that are using the Metadata Schema. This means that the Metadata Schema is currently either applied or denied on the asset.
If the Metadata Schema has not been used on any assets, no information will appear on the screen. Once the Metadata Schema has been used on an asset, the information shown in the example below will appear.

The top level assets where the Metadata Schema has been applied are shown. Child assets will be displayed in the table only when their schema options differ from their parents.
Sections
A section allows you to group metadata fields. You need to add a section before you can add a field to the Metadata Schema. Within the HTML source code of the page, a section will appear as a comment.
Adding a Section
To add a section to a Metadata Schema, go to the Details screen of the schema. Enter the name of the new section into the Section Name field and Save the screen. A new section will appear in the Sections Defined For This Metadata Schema section.
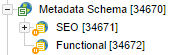
A Metadata Section asset will also appear under the Metadata Schema in the Asset Map.
Editing a Section
To edit a section, right click on the Section asset in the Asset Map and select Details.
Details
This section allows you to change the name of the section and add a description.
The following fields are available:
- Section Name: The name of the Section.
- Section Description: A description of the Section. This will be displayed on the Metadata screen of an asset. It can be used to display information to your users about the purpose of this Section.
Options
This section allows you to decide whether or not to show the Section, all of its fields, and its description in the HTML source code of the page.
The following fields are available:
- Show On Frontend: Select whether or not to show the section on the front-end. By default, this value is Yes meaning that the Section and all of its fields will appear in the HTML source code on the front-end.
- Show Description On Frontend: Select whether or not to show the section description on the front-end.
Deleting a Section
To do delete a section and its fields from a Metadata Schema, go to the Details screen of the schema. In the Sections Defined For This Metadata Schema section, select Delete this section and all its fields for the section you want to delete and Save the screen.
Fields
For a Metadata Schema, a field can only be added to a Section. There are different types of fields you can use within a Metadata Schema. To read more about each field type, refer to the Metadata Fields chapter of this manual.
Adding a Field
To add a field to a Metadata Schema, go to the Details screen of the schema. In the Sections Defined For This Metadata Schema, under the Section you want to add the field to, enter the name of the field into the New Field Name, select its type from the New Field Type list and Save the screen. The field will be added to the Fields list for that section.
A Field asset will also appear under the section in the Asset Map.
Editing a Field
There are two ways to edit a field within a Metadata Schema. On the Details screen of the Schema, click on the Edit Metadata Field link for the field. This will take you to the Details screen for that field.
Alternatively, you can right click on the Field asset in the Asset Map and select Details.
Required Metadata Fields
On the Details screen of a field you can mark a field as required. When you mark a field as required, the assets that have this Metadata Schema applied to, will not be able to go Live until the required fields have been filled in. If Workflow has been applied to an asset, the approval process will not be completed until the required values have been filled in.
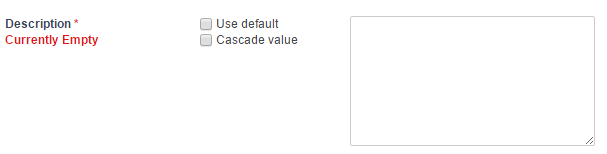
Required fields will be marked with an asterisk on the Metadata screen of an asset, as shown in the example below, and will display the message currently empty if no metadata has yet been assigned.
Using Keyword Replacements
On the Details screen for a Metadata field you can use a keyword replacement in place of a value in a field. For example, you can use a keyword replacement %asset_name% in the Default field. For a full list of keyword replacements that can be used, click on the View all available keyword replacements link located under the Details section heading on the screen.
When you click on this link a pop up will appear showing the full list of available keyword replacements. You can then copy and paste the keyword replacement you want to use from the list into a field.
Deleting a Field
To do delete a field from a Metadata Schema, go to the Details screen of the schema. In the Sections Defined For This Metadata Schema section, check the Delete box for the field you want to delete and Save the screen.
Even after deleting a Metadata Field, it will still appear on assets that had that field populated already until their Metadata is regenerated.
Applying a Metadata Schema
Once you have built a Metadata Schema, you can apply it to various assets within your system. You can also apply multiple Metadata Schemas to an asset.
If, however, two or more schemas have the same field name, a warning message will appear. For example, if you apply two Metadata Schemas to an asset and both schemas have the field Description, a warning will appear. It is strongly recommended to keep your metadata fields uniquely named for this reason.
Any Matrix user can add or edit a Metadata Schema, but only users with administration privilege to an asset can apply a Metadata Schema to that asset.
You can apply a Metadata Schema to an asset on the Metadata Schemas screen. Once a schema has been applied, you can fill out the values on the Metadata screen. For more information on how to apply a Metadata Schema and fill out the values, refer to the Asset Screens manual.
Regenerating a Metadata Schema
If you have made changes to a Metadata Schema (i.e. added or removed sections or fields or changed the default value of a field) and it has already been applied to assets in the system, you need to regenerate the metadata files before your changes will affect these assets.
To do this, go to the Details screen of the Metadata Schema. Check the Regenerate metadata files box and Save the screen.
Metadata on an asset will also get regenerated on an asset every time you Save the Metadata screen on an asset when editing it. This will update things like updated default metadata field values and remove any metadata that has been deleted from a Schema.
Furthermore, if you choose to cascade a Metadata editing change on an asset, all child assets where the change is applied to will also have their Metadata regenerated.